Transferring Local Files to the MSU HPCC via Globus Connect Personal
This guide provides step-by-step instructions for transferring files from your local machine to the Michigan State University High-Performance Computing Center (MSU HPCC) using Globus Connect Personal. This setup is ideal for users new to Globus or needing to transfer files from a personal computer.
Prerequisites
- MSU NetID and Password: Ensure you have an active MSU NetID and password.
- HPCC Account: You must have an account on the MSU HPCC.
- Globus Account: You’ll use your MSU credentials for authentication.
- Globus Connect Personal: Installed and configured on your local machine.
- Network Access: Ensure you have a stable internet connection.
Step-by-Step Guide
1. Install Globus Connect Personal on Your Local Machine
- Visit https://www.globus.org/globus-connect-personal.
- Download the installer for your operating system (Windows, macOS, or Linux).
- Follow the on-screen instructions to complete the installation.
2. Set Up Globus Connect Personal
- After installation, open Globus Connect Personal.
3. Access the Globus Web Interface
- Open your web browser.
- Go to https://app.globus.org/.
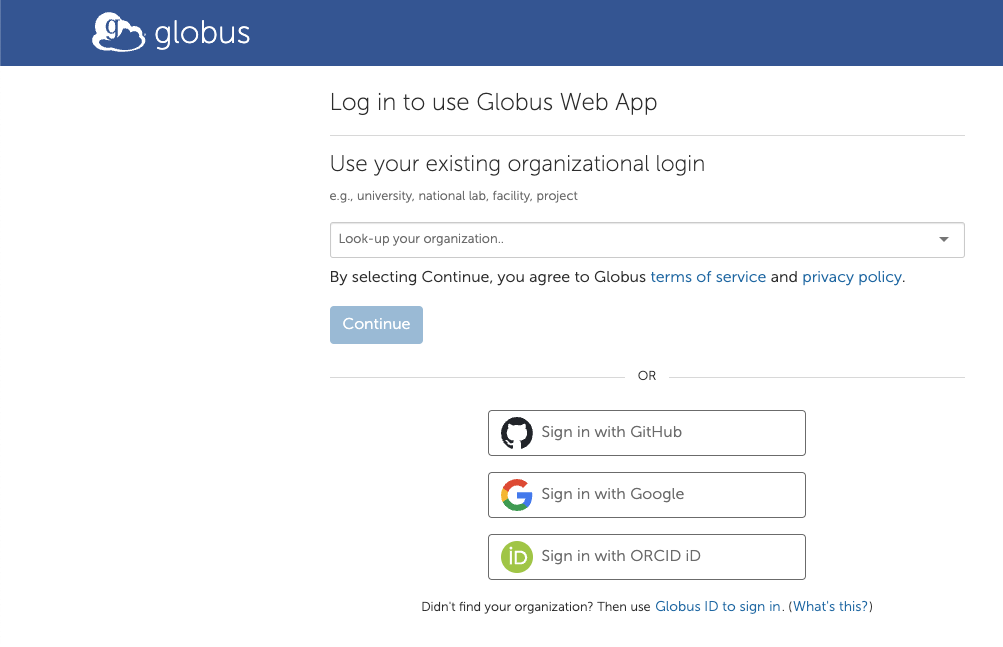
4. Log In with Your MSU Credentials
- Use your MSU credentials to log in.
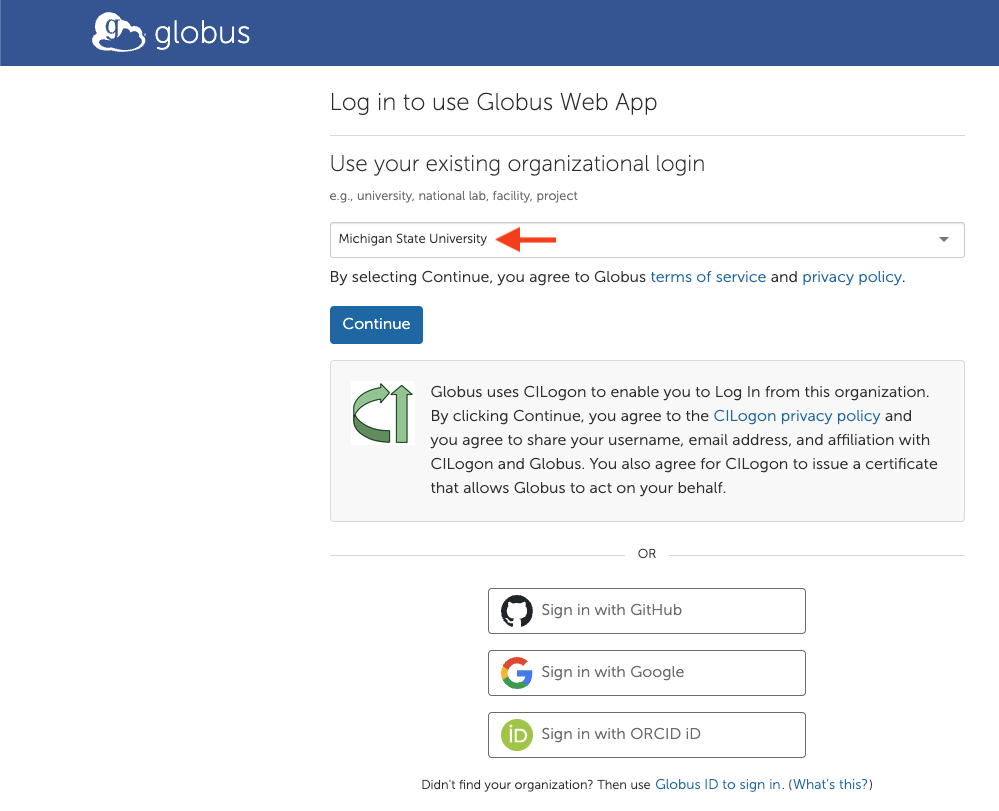
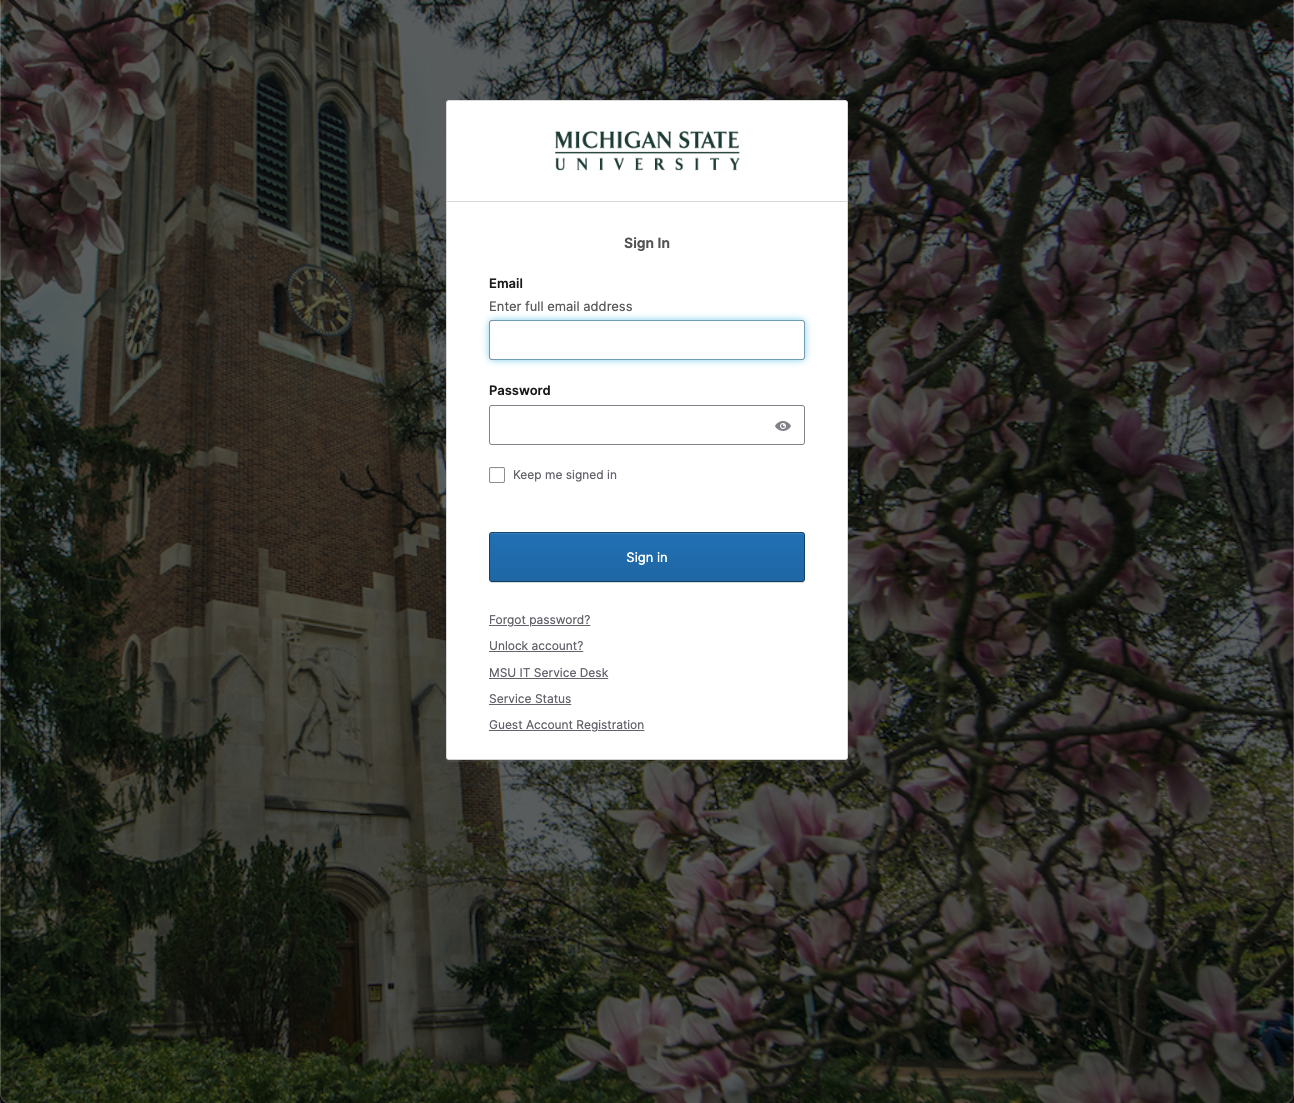
5. Authenticate with MSU
- You will be redirected to the MSU login page.
- Enter your MSU NetID and password.
- Click “Login”.
-
After successful login, you’ll be redirected back to the Globus web app.
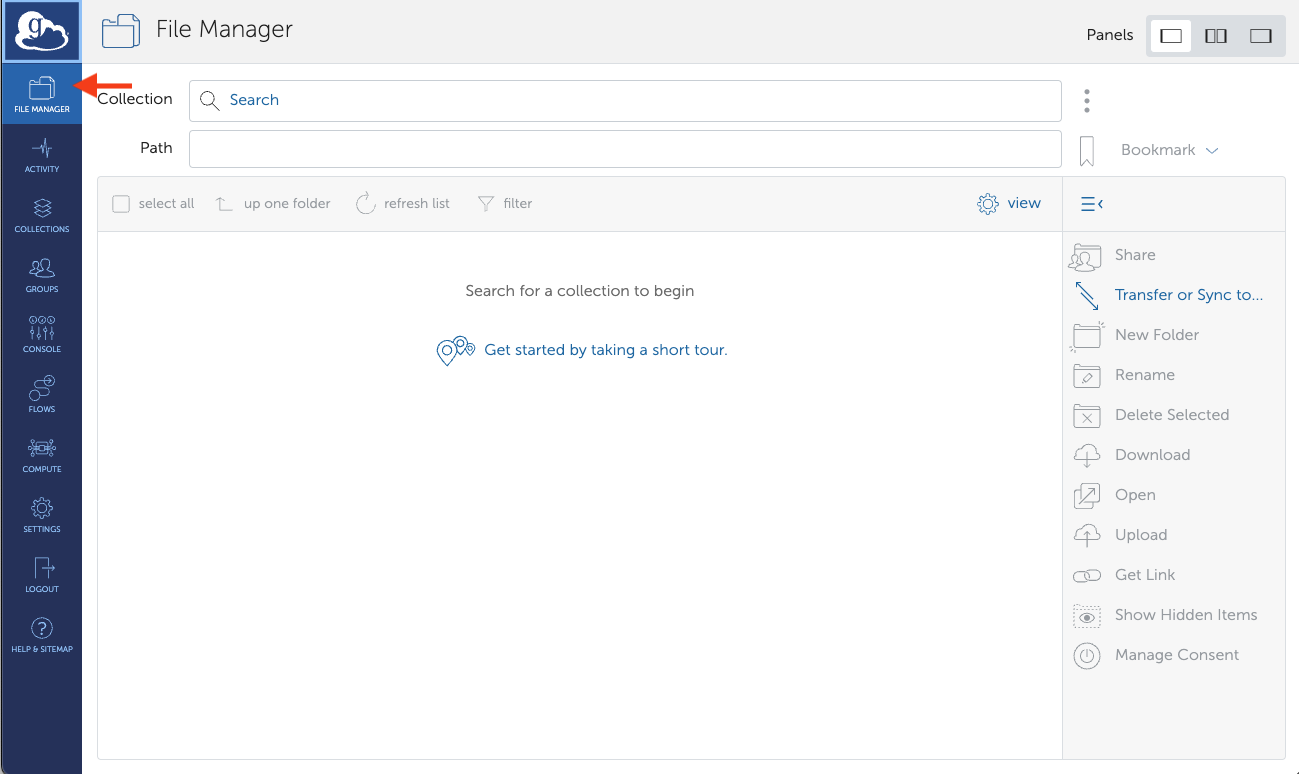
6. Navigate to the File Manager
-
On the left-hand side menu, click on “File Manager”.
7. Select the Source Collection (Local Files)
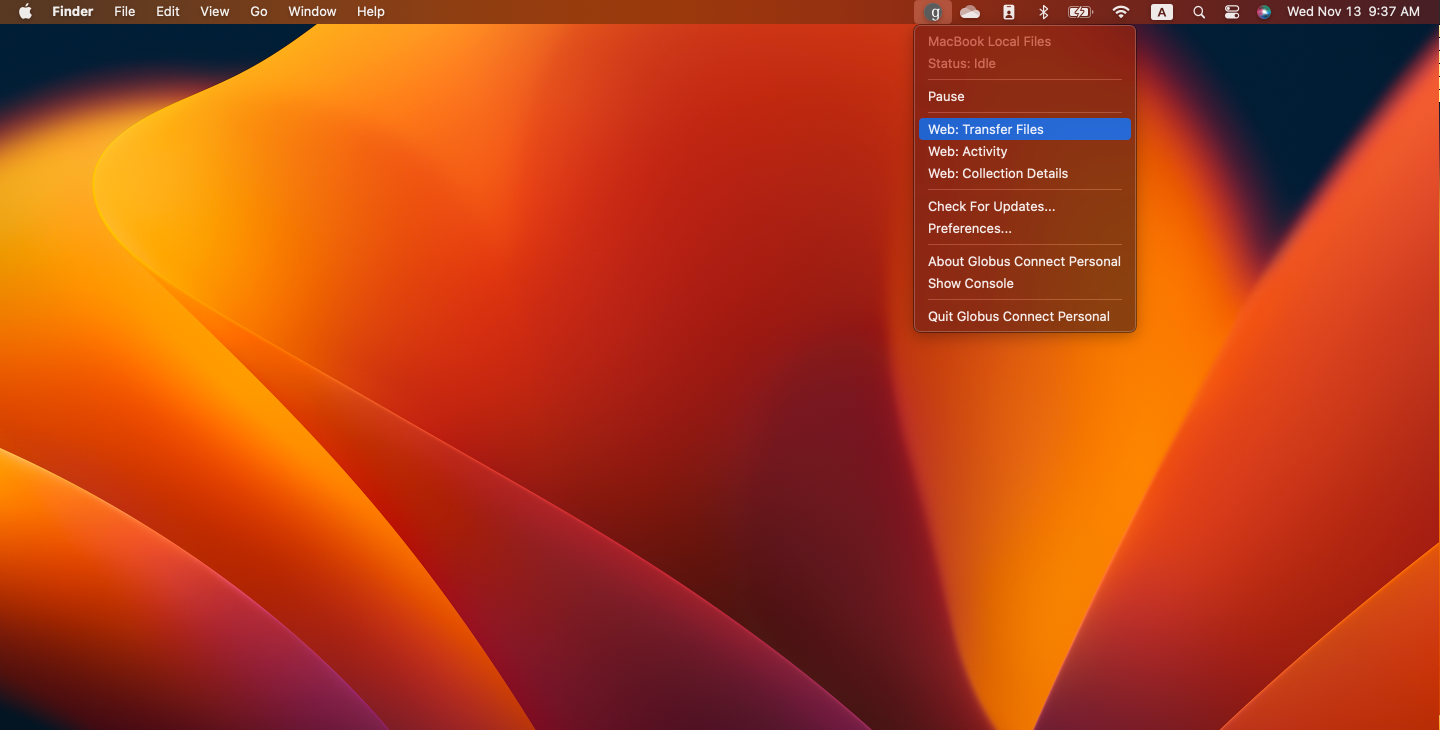
- From your computer, click on the Globus Connect Personal icon.
-
Select “Web: Transfer Files” from the dropdown.
8. Select the Files to Transfer
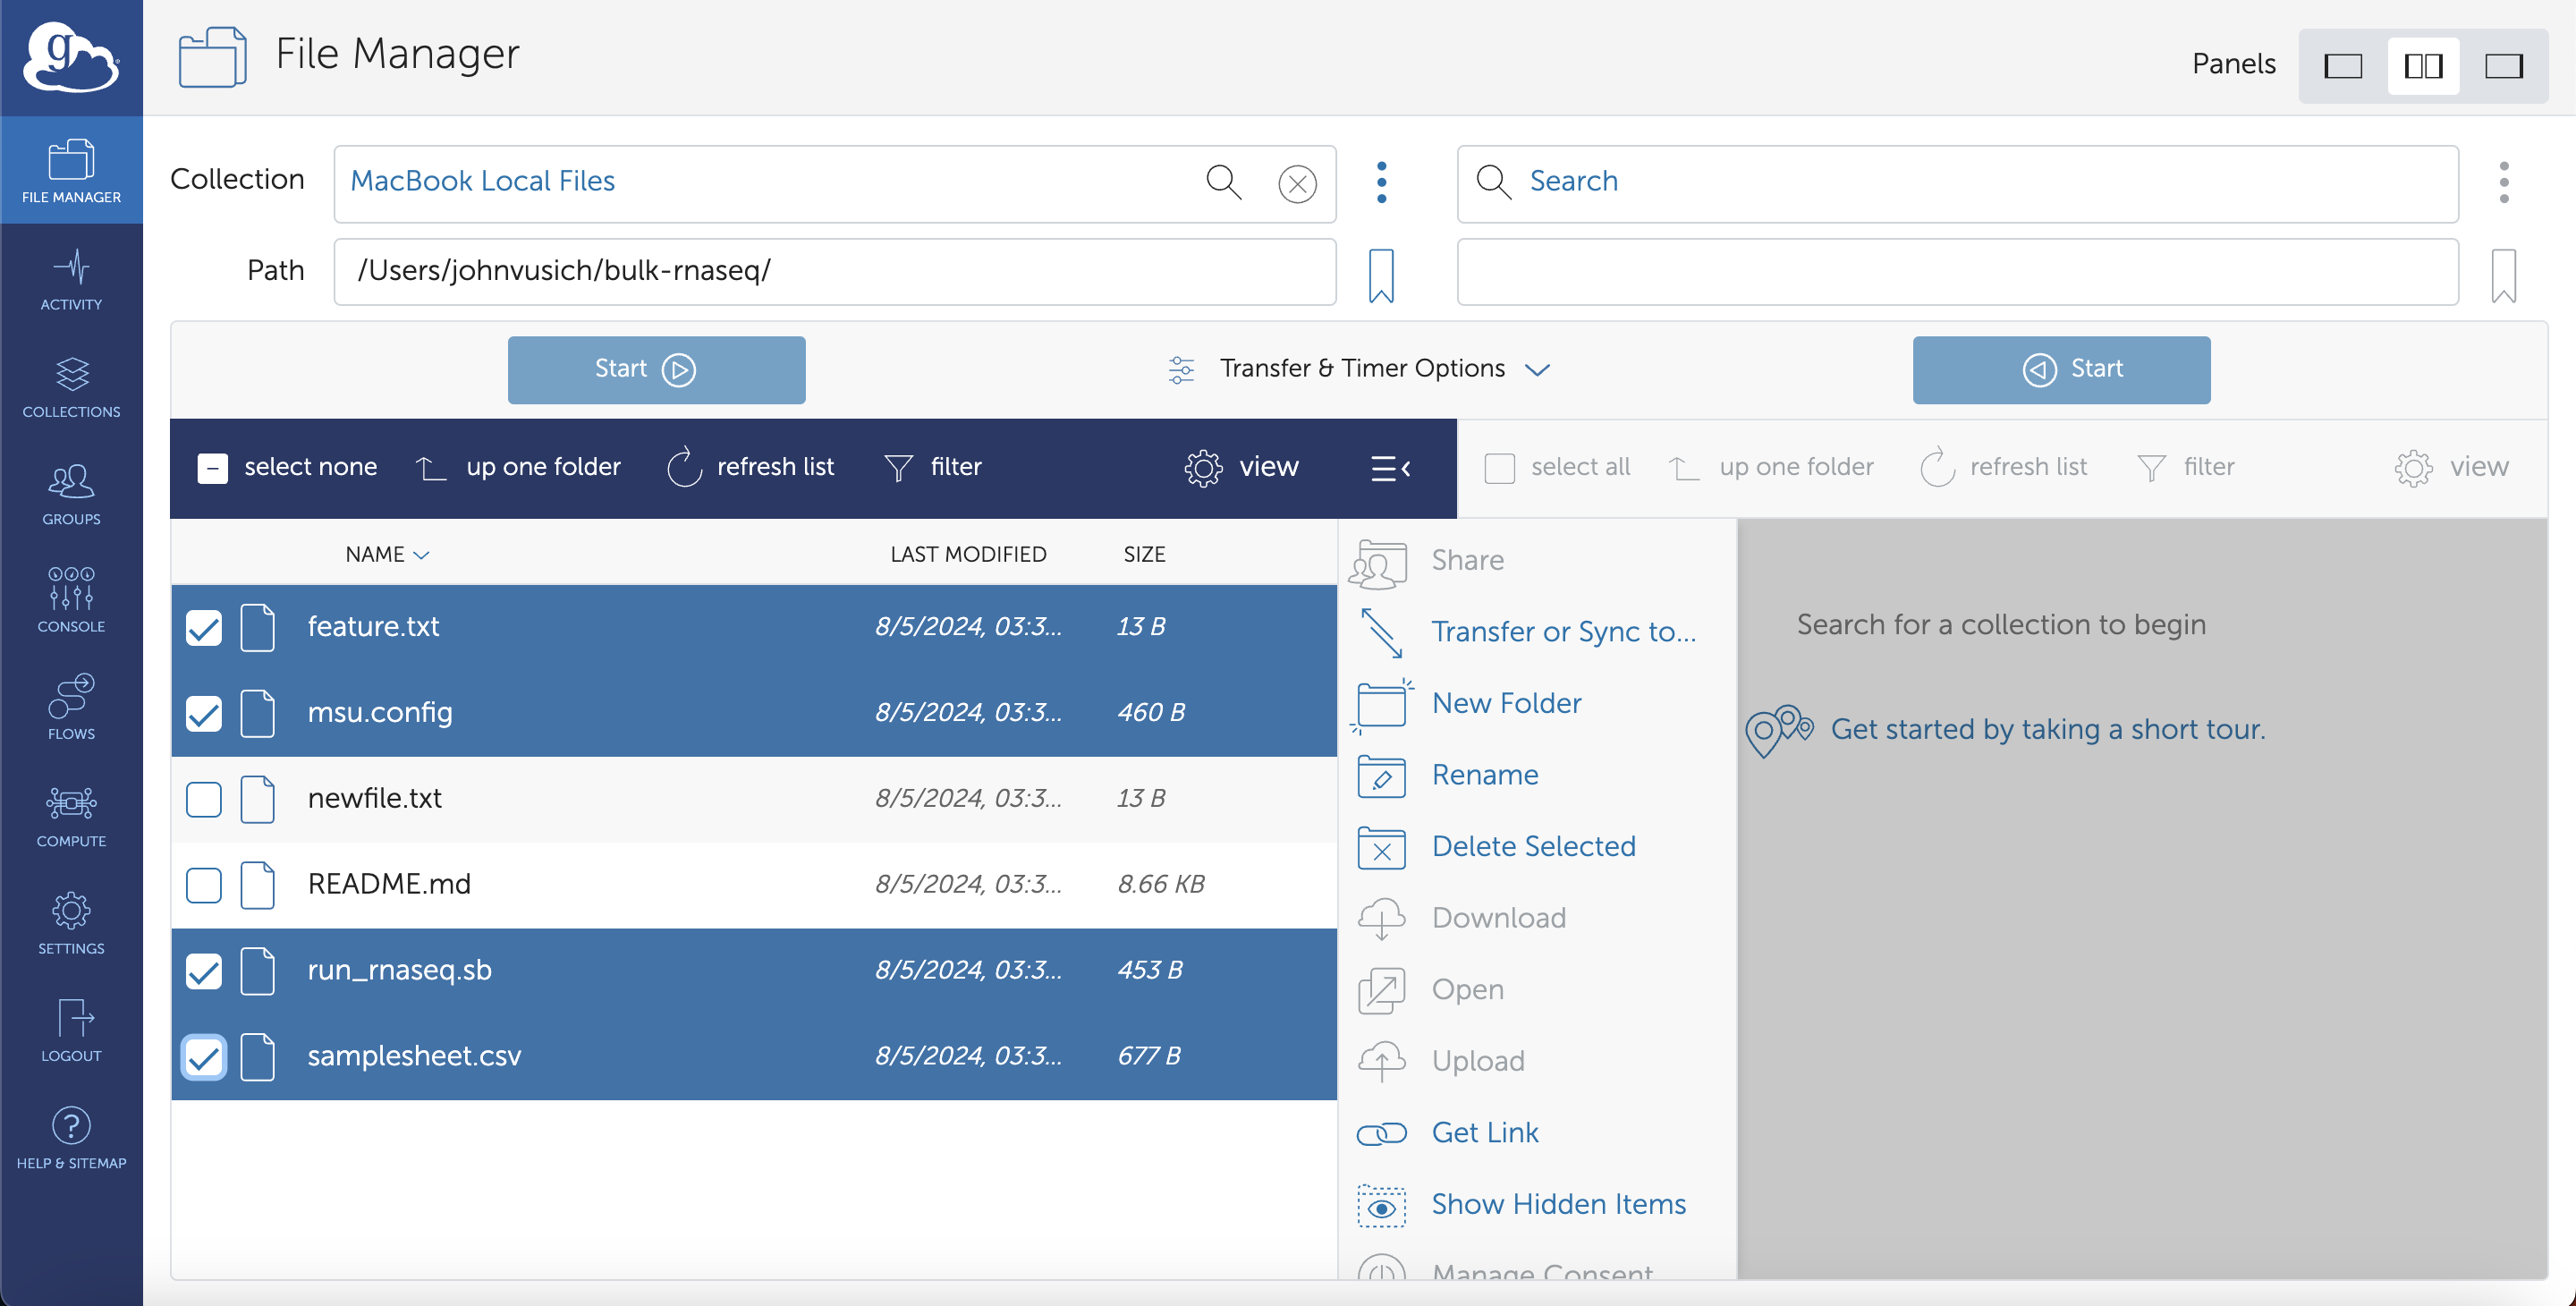
- Once authenticated, your OneDrive files and folders will appear in the source panel.
- Navigate through the folders to locate the files you wish to transfer.
- Click to select the files or folders you want to transfer.
-
You can select multiple items by holding down the Ctrl key (Windows) or Command key (Mac) while clicking.
9. Set Up the Destination Endpoint (msu#hpcc)
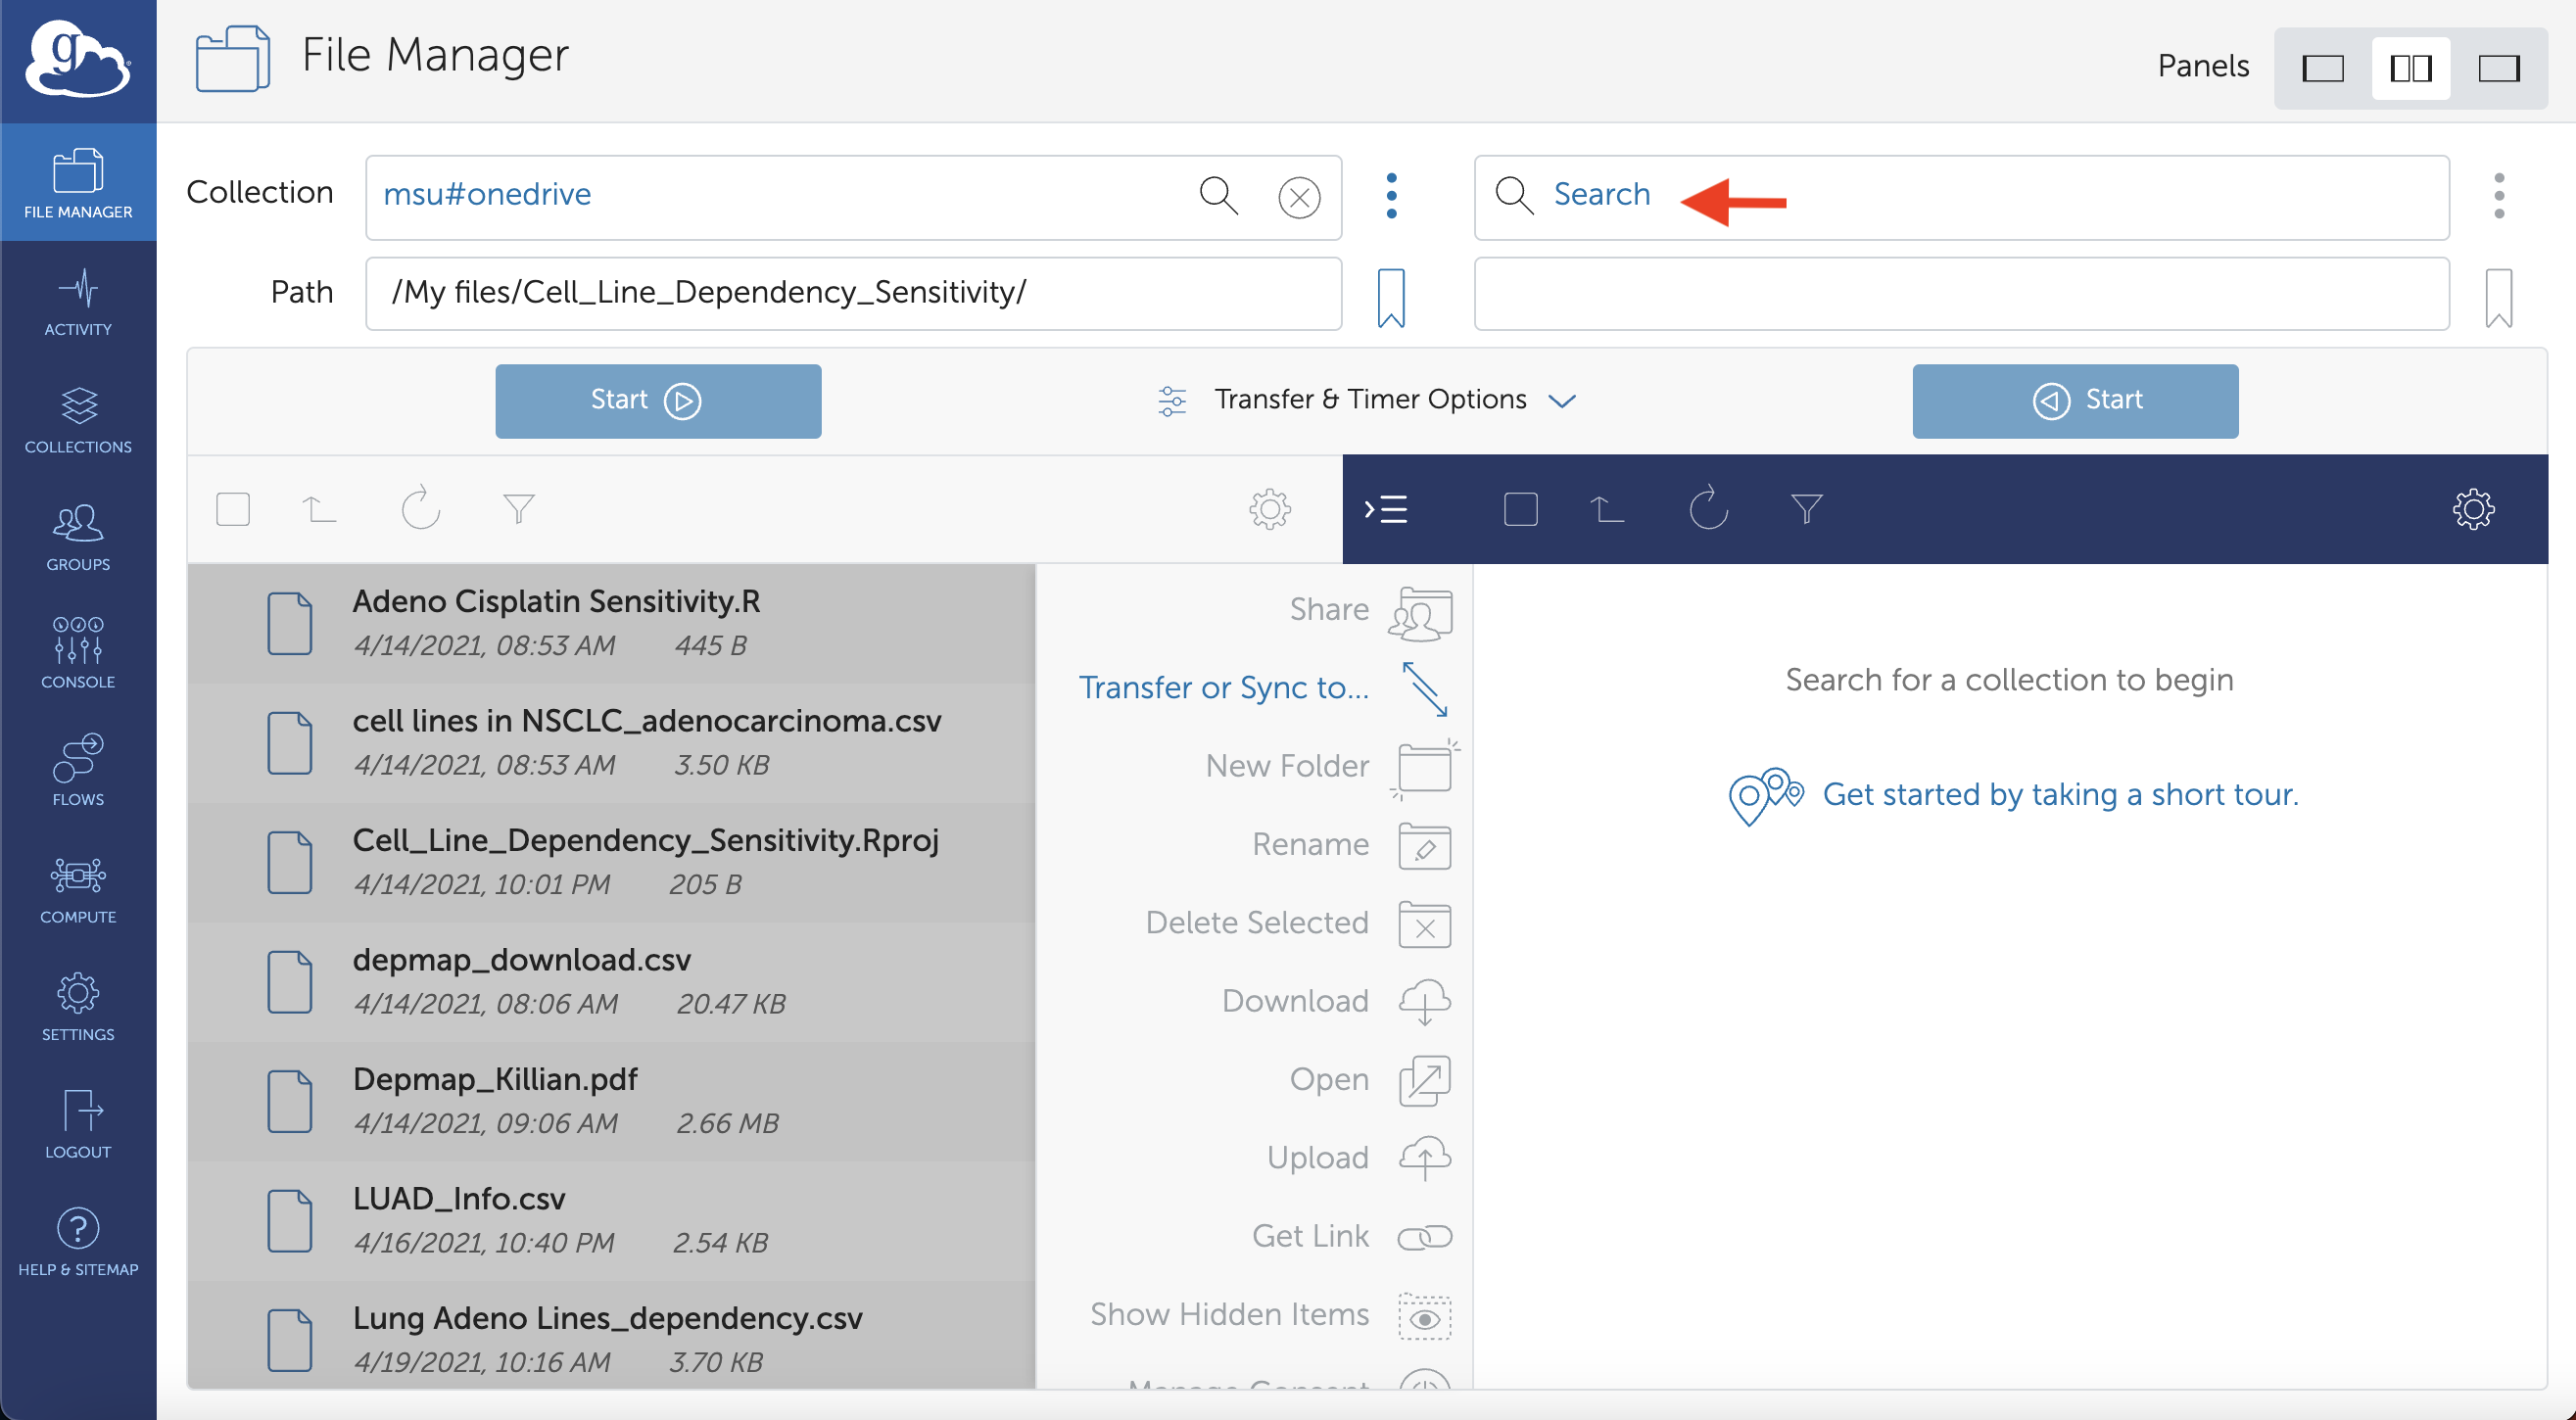
- Above the source panel, click on “Transfer or Sync to…“ to open the destination panel on the right.
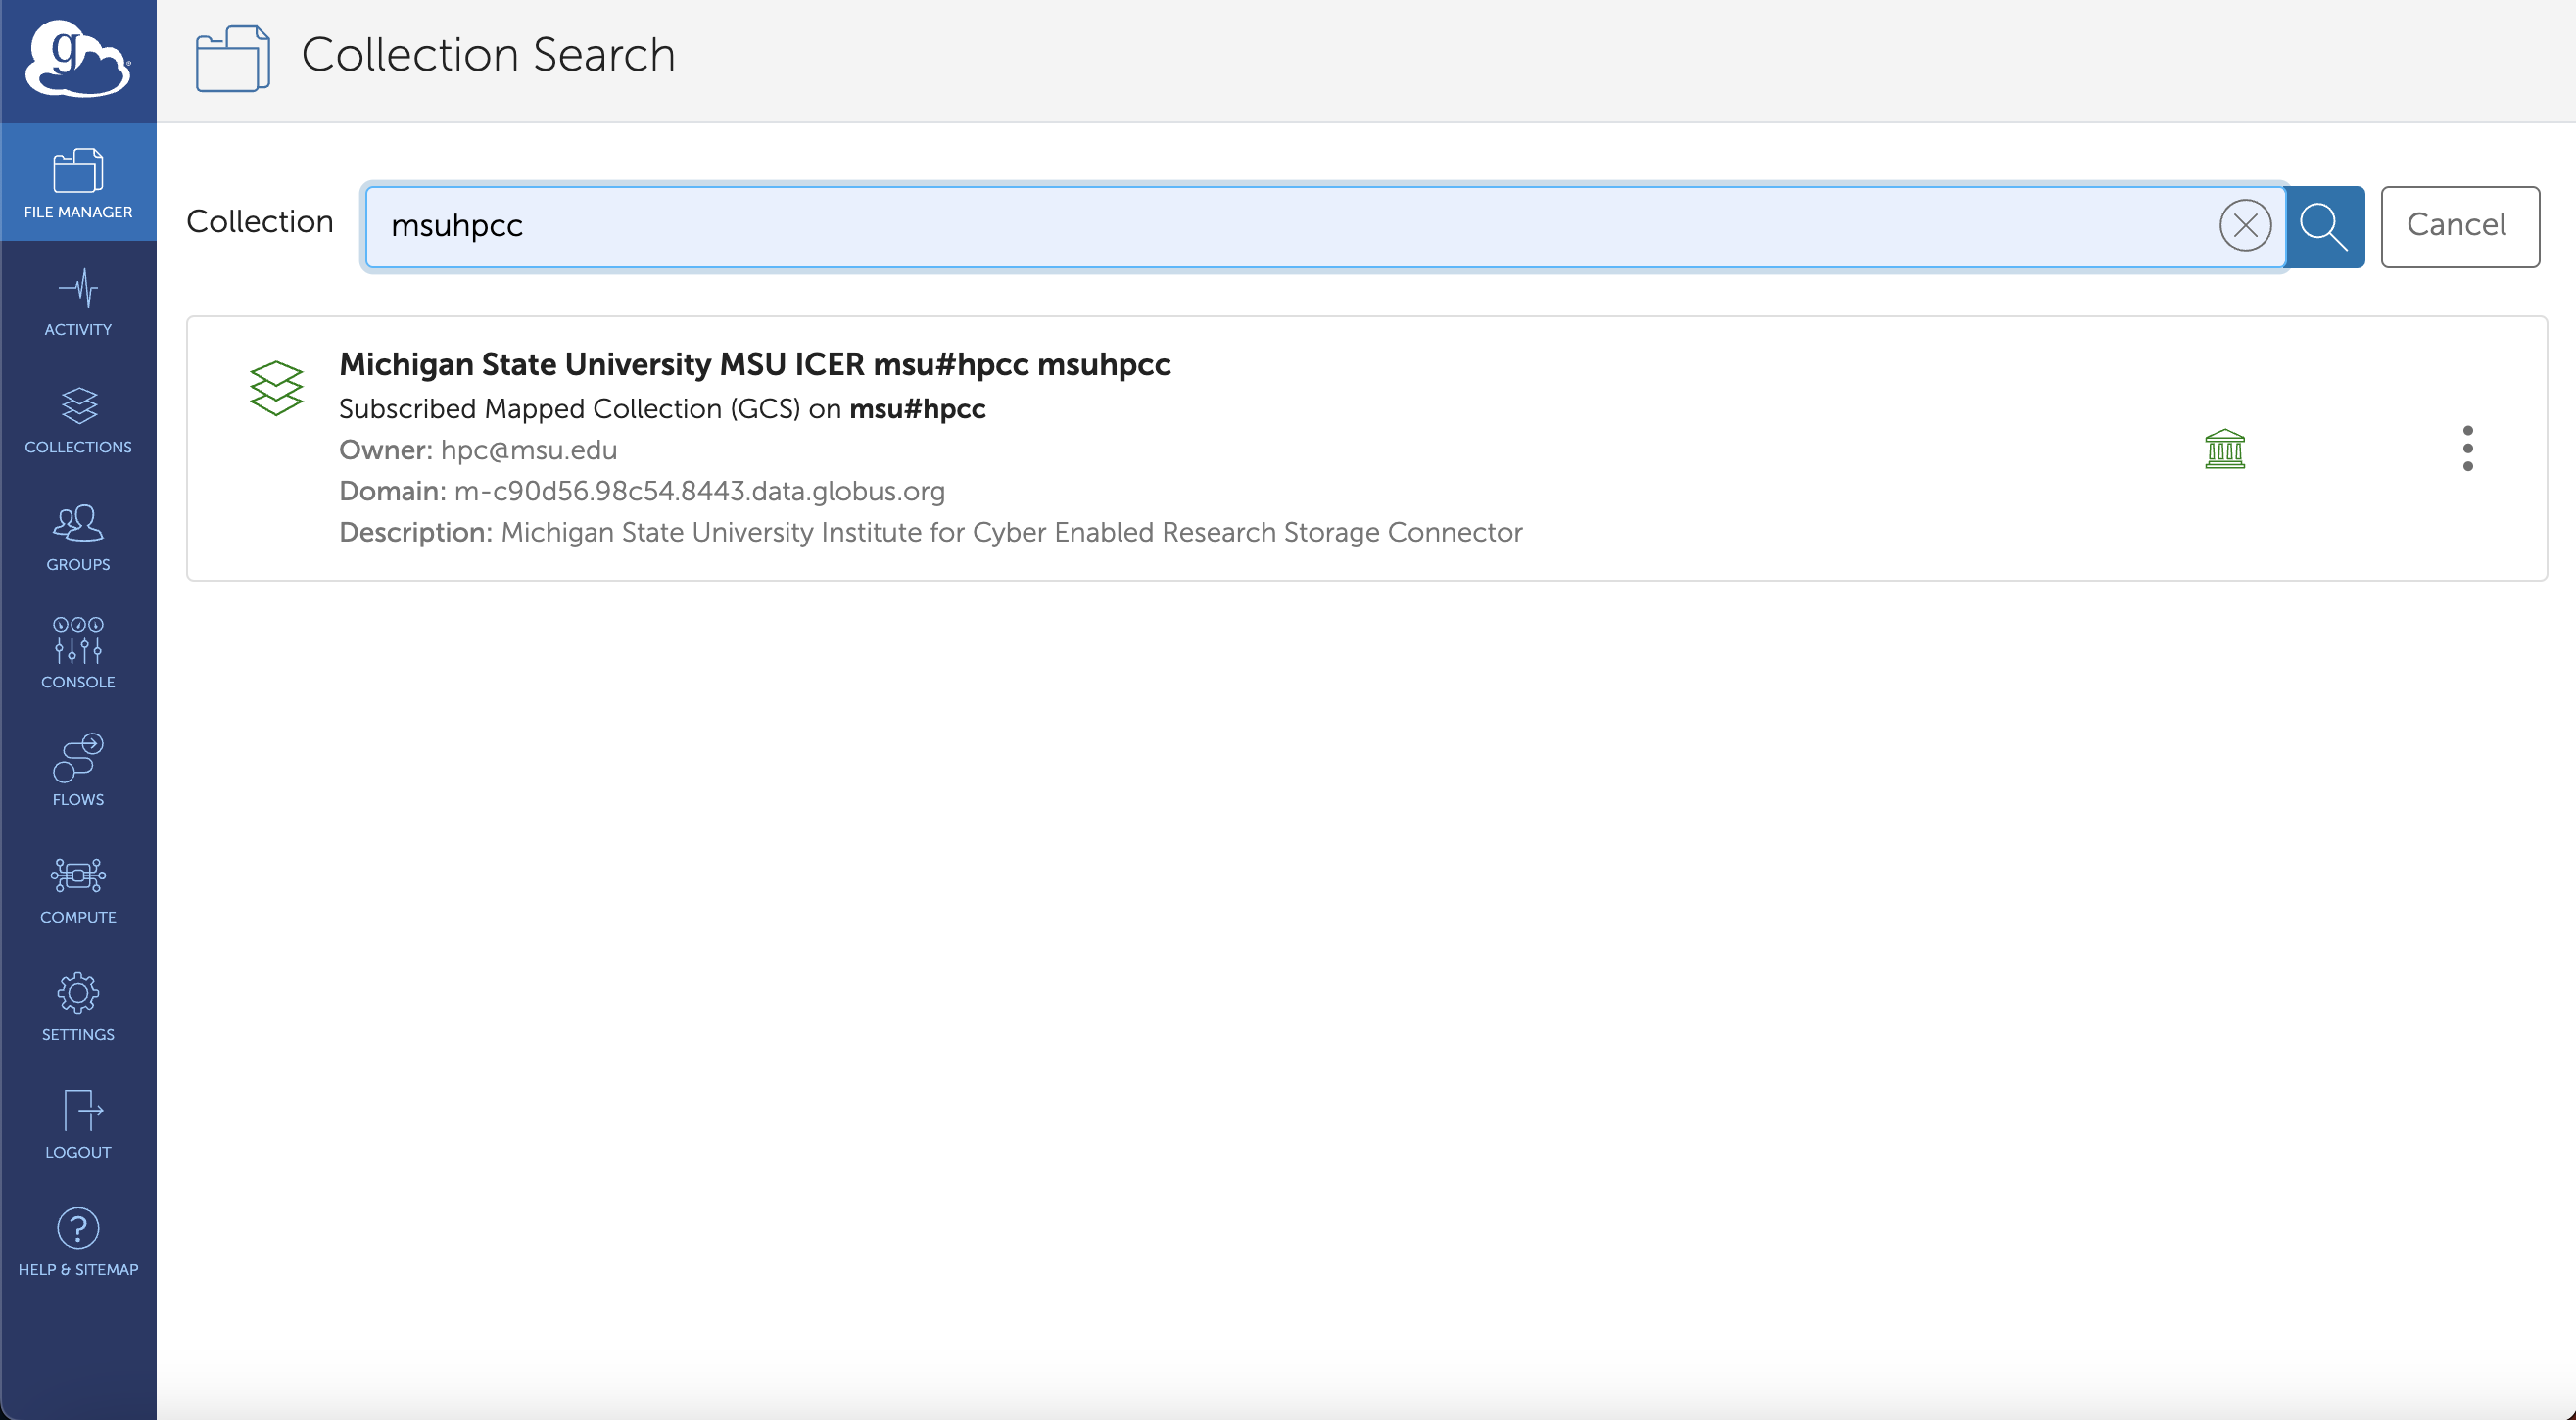
- In the destination panel, click on the empty search bar next to “Collection”.
- Type “msu#hpcc”.
-
Select “msu#hpcc” or “Michigan State University MSU ICER” from the list.
10. Authenticate the MSU HPCC Endpoint (If Prompted)
- You may be prompted to authenticate the MSU HPCC endpoint.
- Click “Continue” or “Authenticate” as prompted.
-
Follow any additional on-screen instructions to complete authentication.
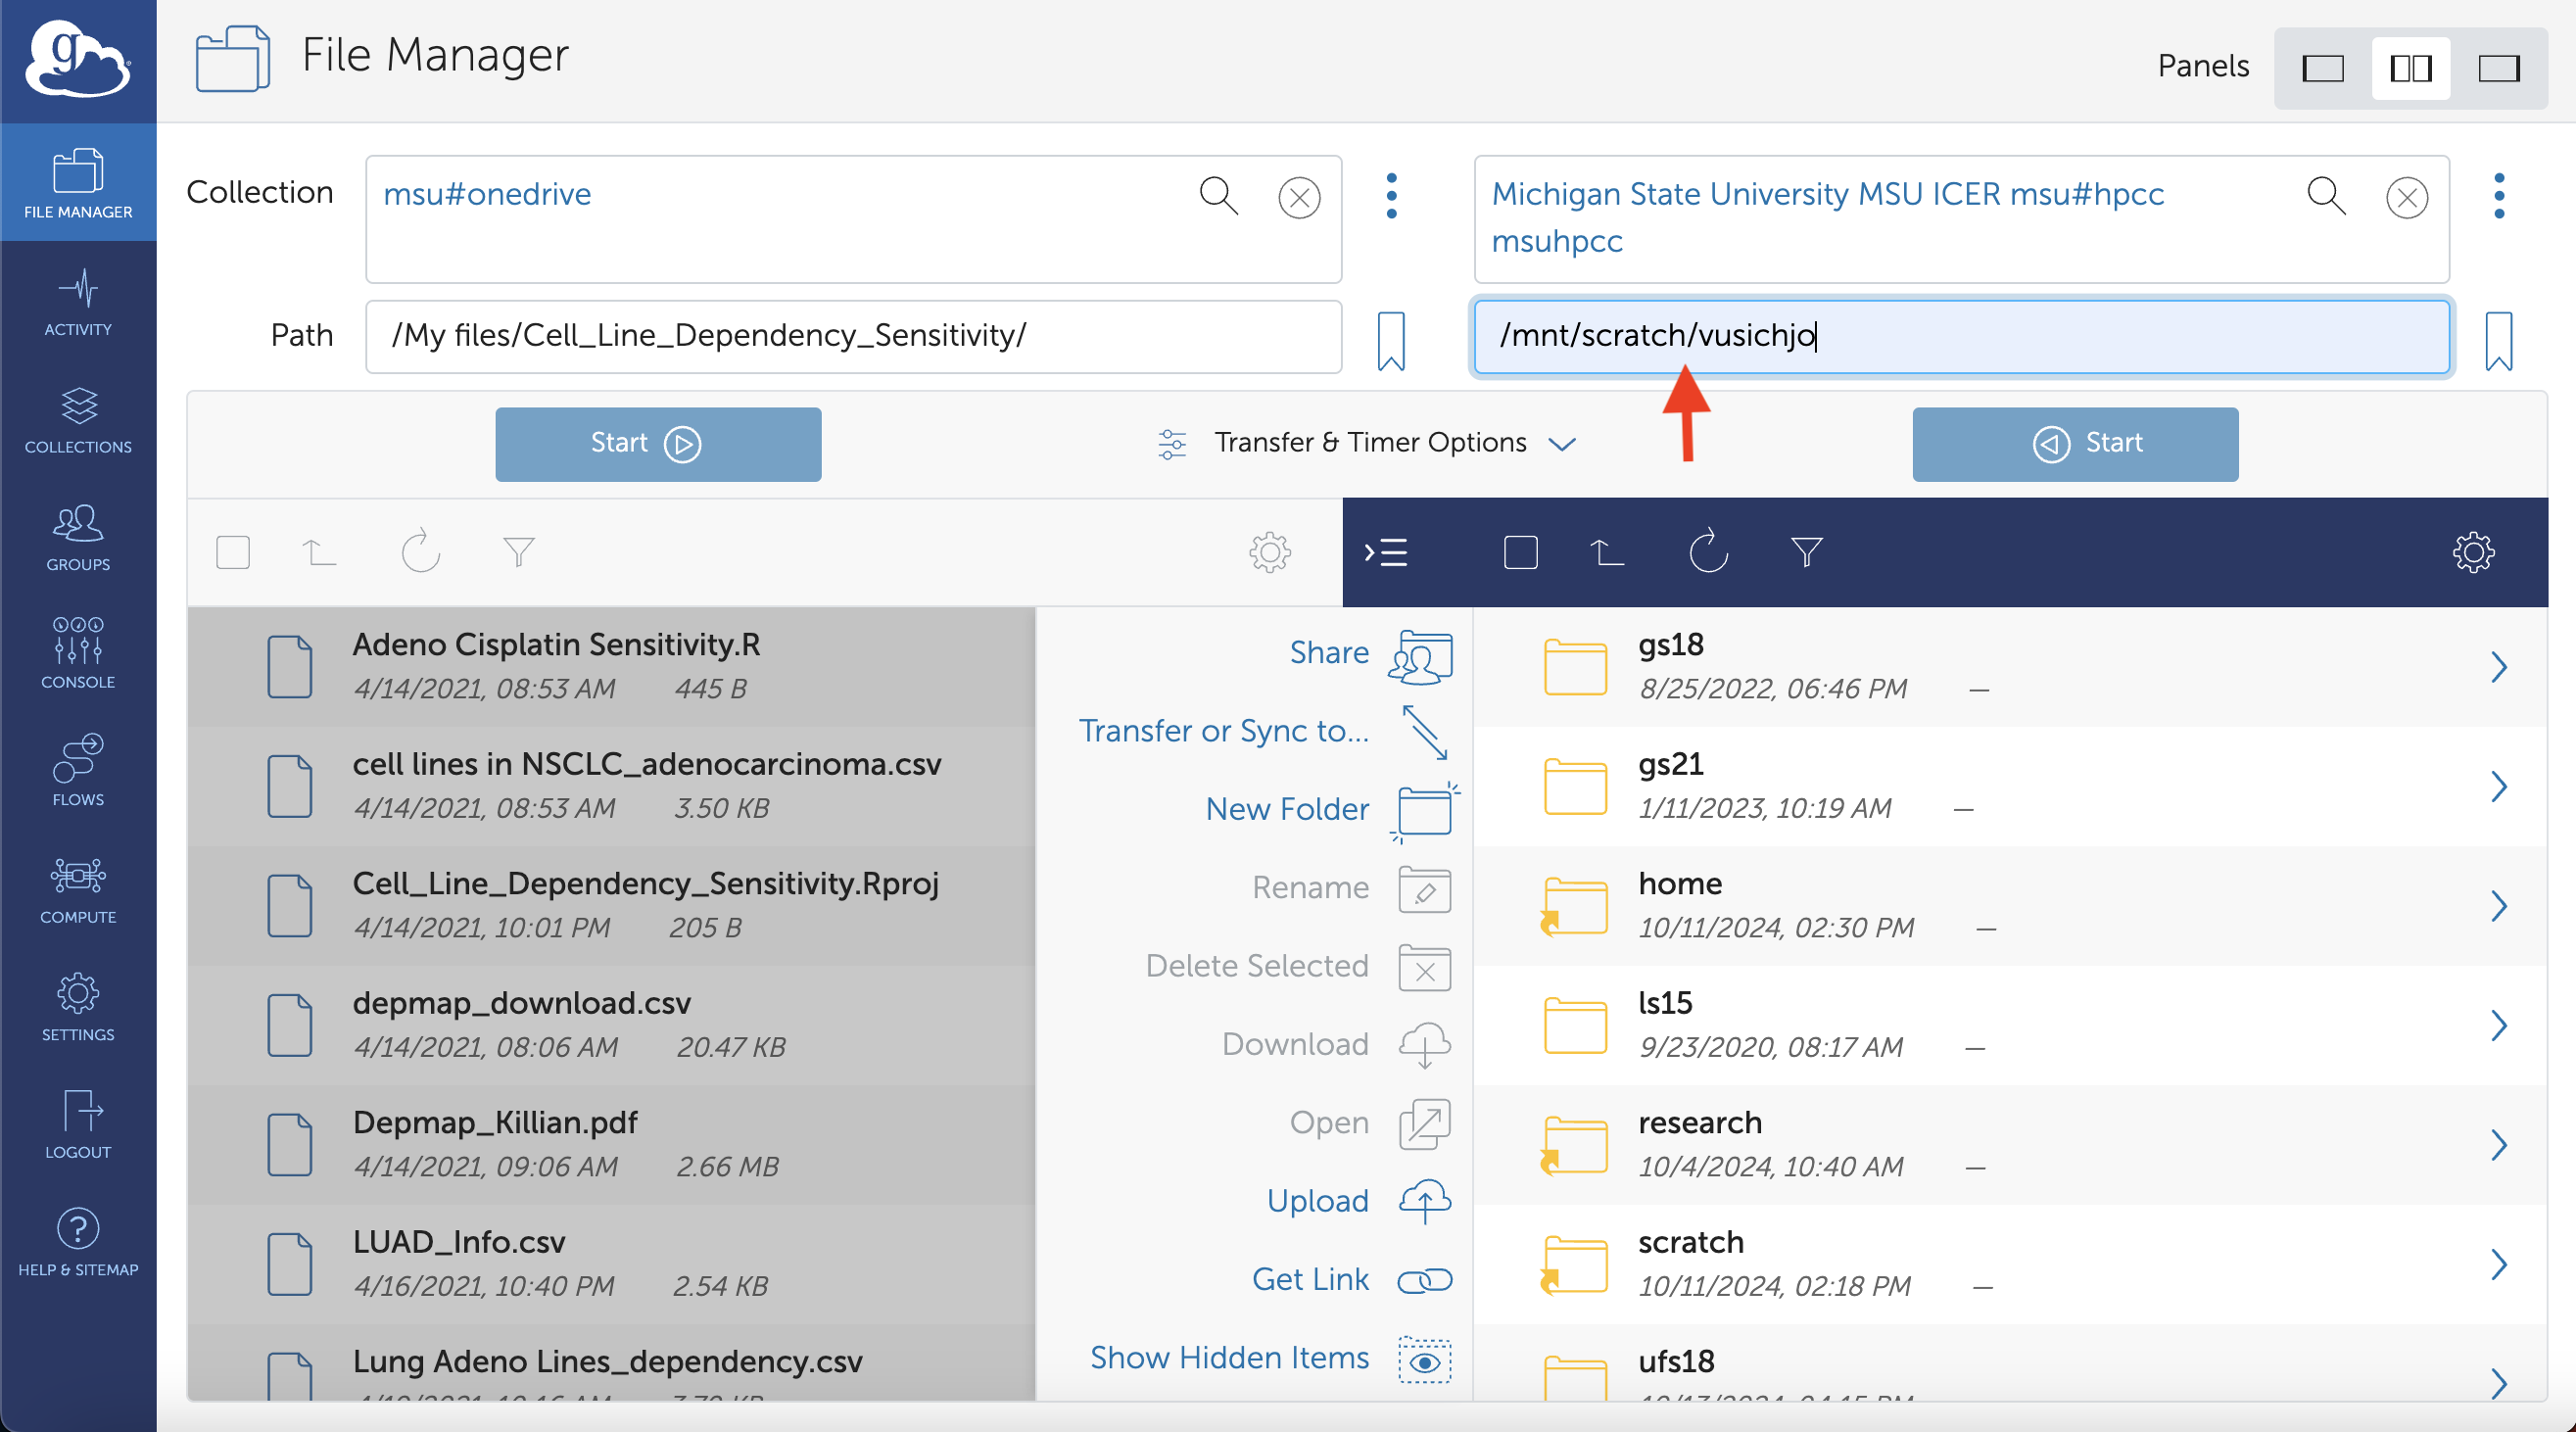
11. Specify the Destination Path on the HPCC
- In the destination panel, locate the “Path” field.
- Enter the path where you want to store your data on the HPCC.
- For example:
/mnt/scratch/$yourUsername - Replace
$yourUsernamewith your actual HPCC username.
- For example:
- Press Enter or click the arrow button to navigate to this directory.
- Note: If the directory doesn’t exist, ensure you have the correct path or create the directory using HPCC resources.
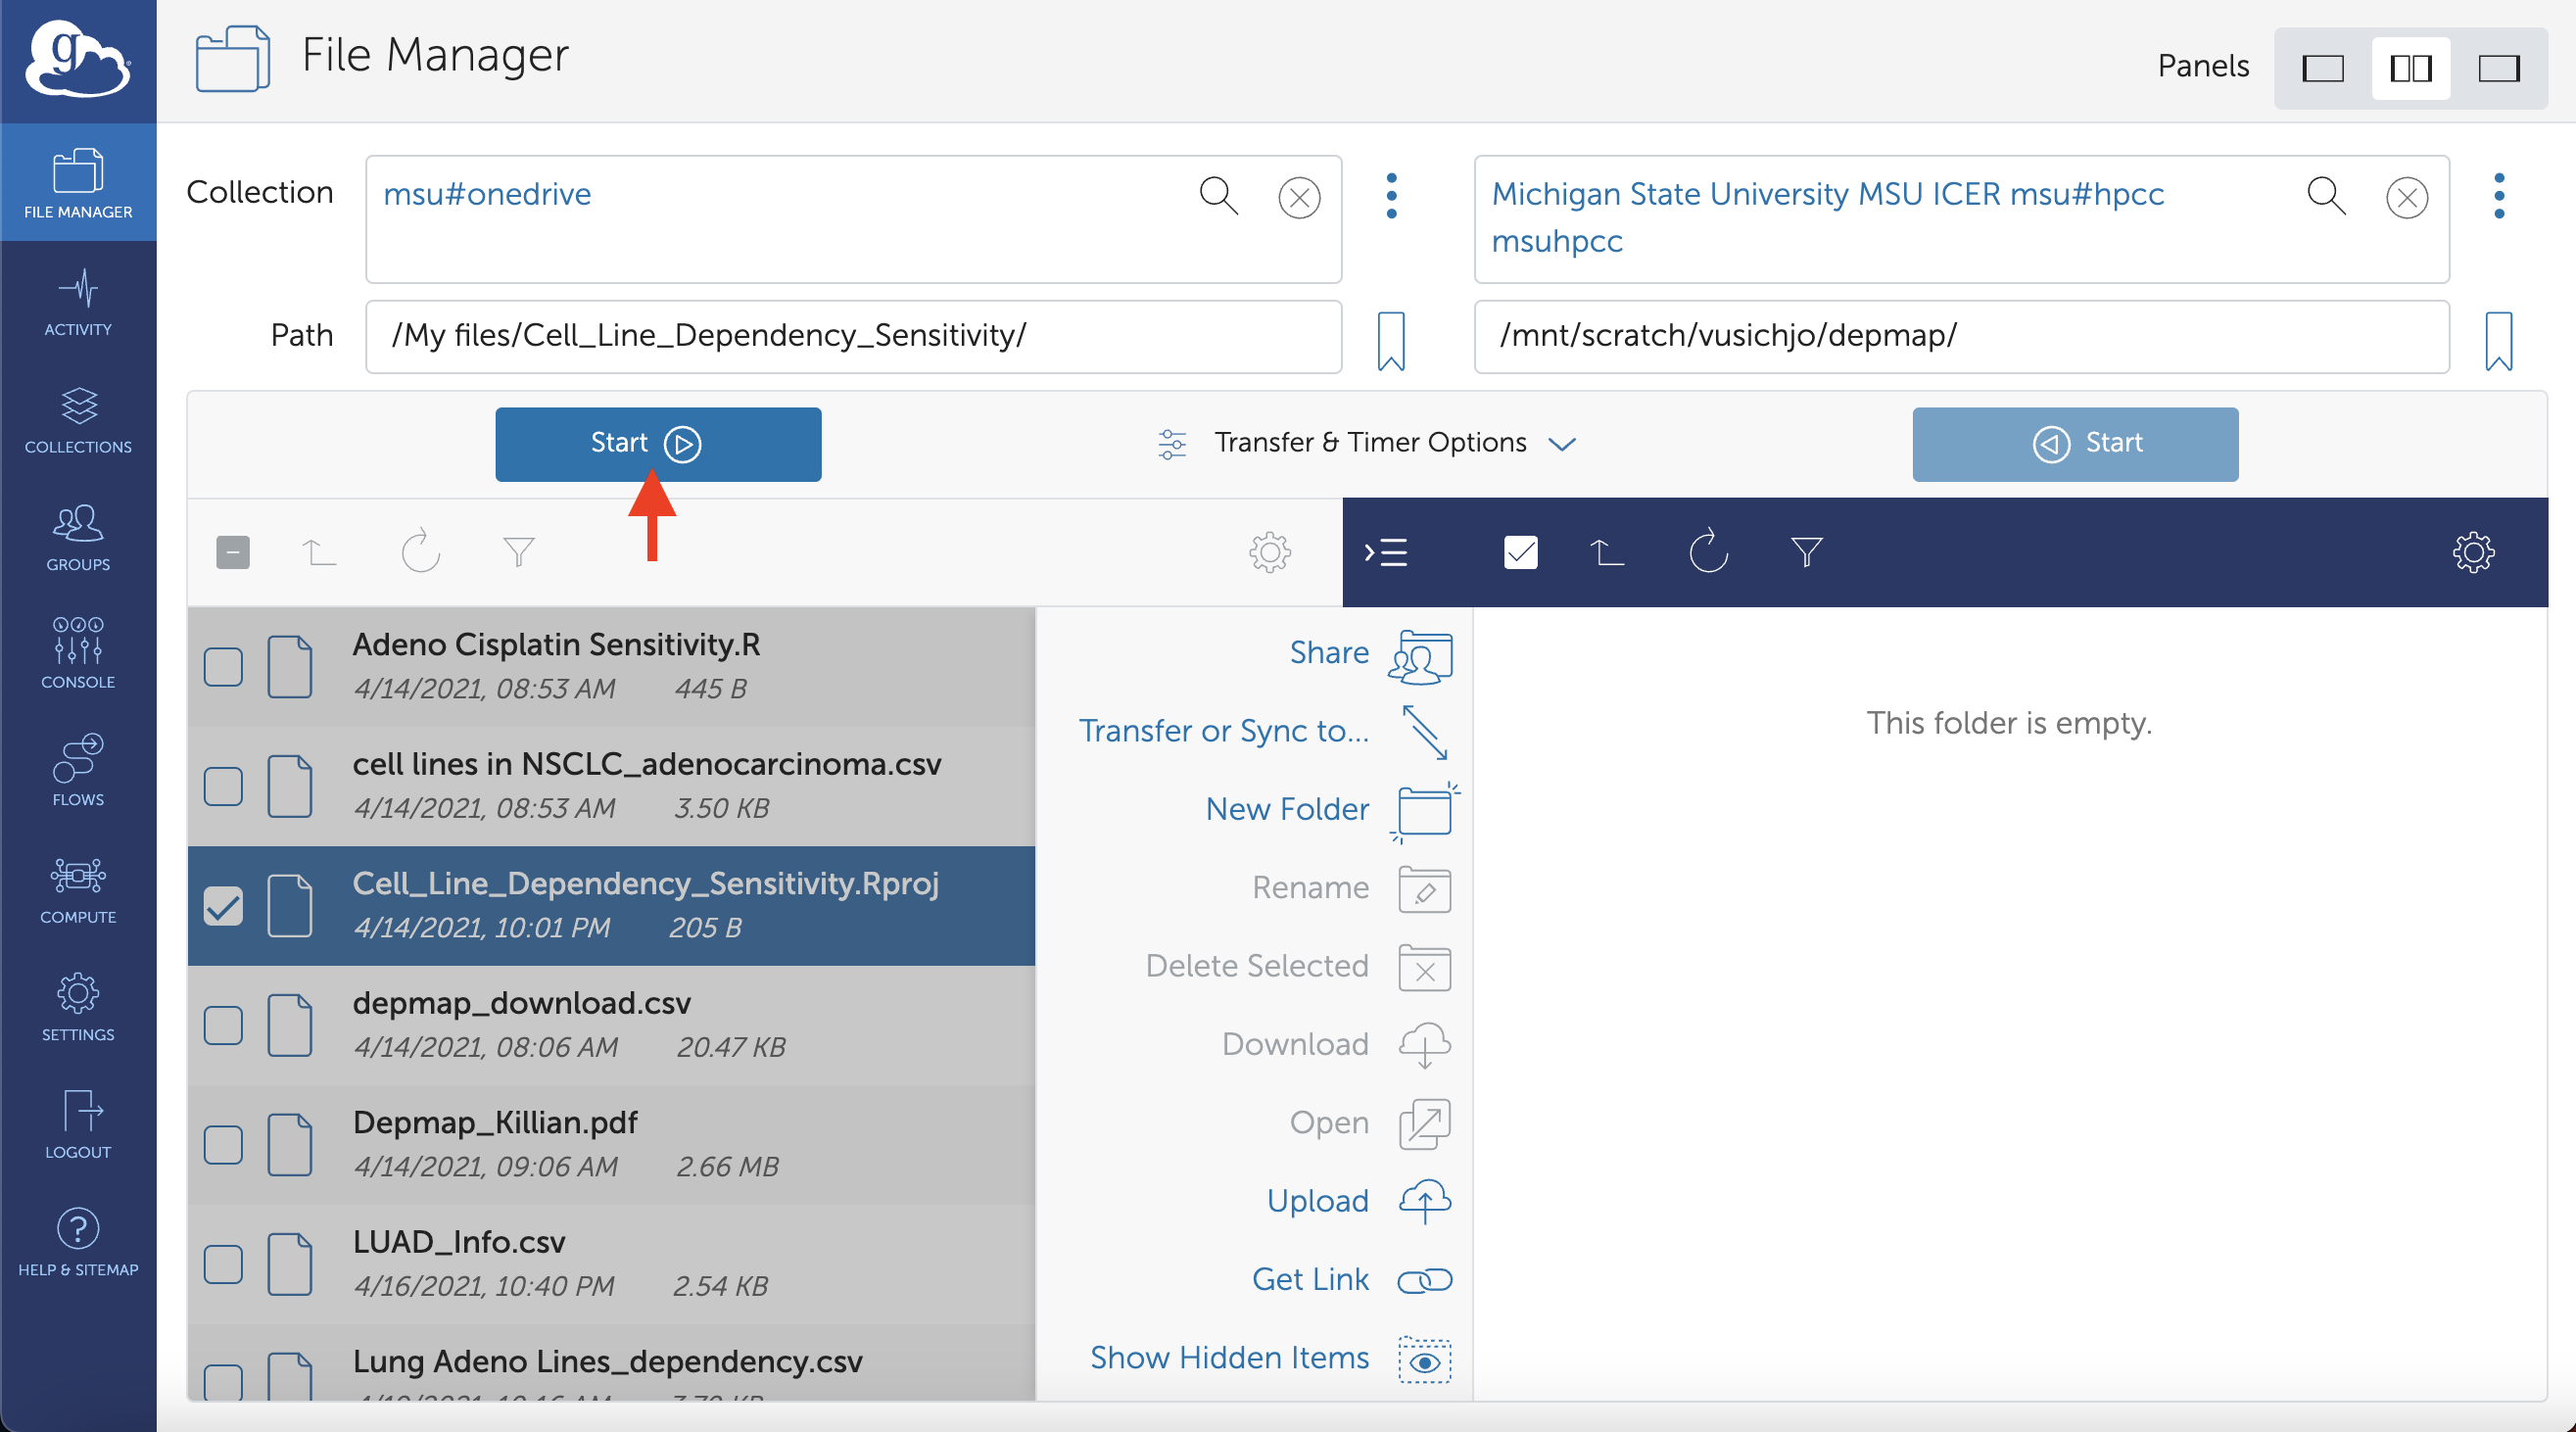
12. Start the Transfer
- Review your selections:
- Ensure the correct files are selected in the source panel.
- Confirm the destination path is correct.
-
Click the “Start” button to begin the transfer.
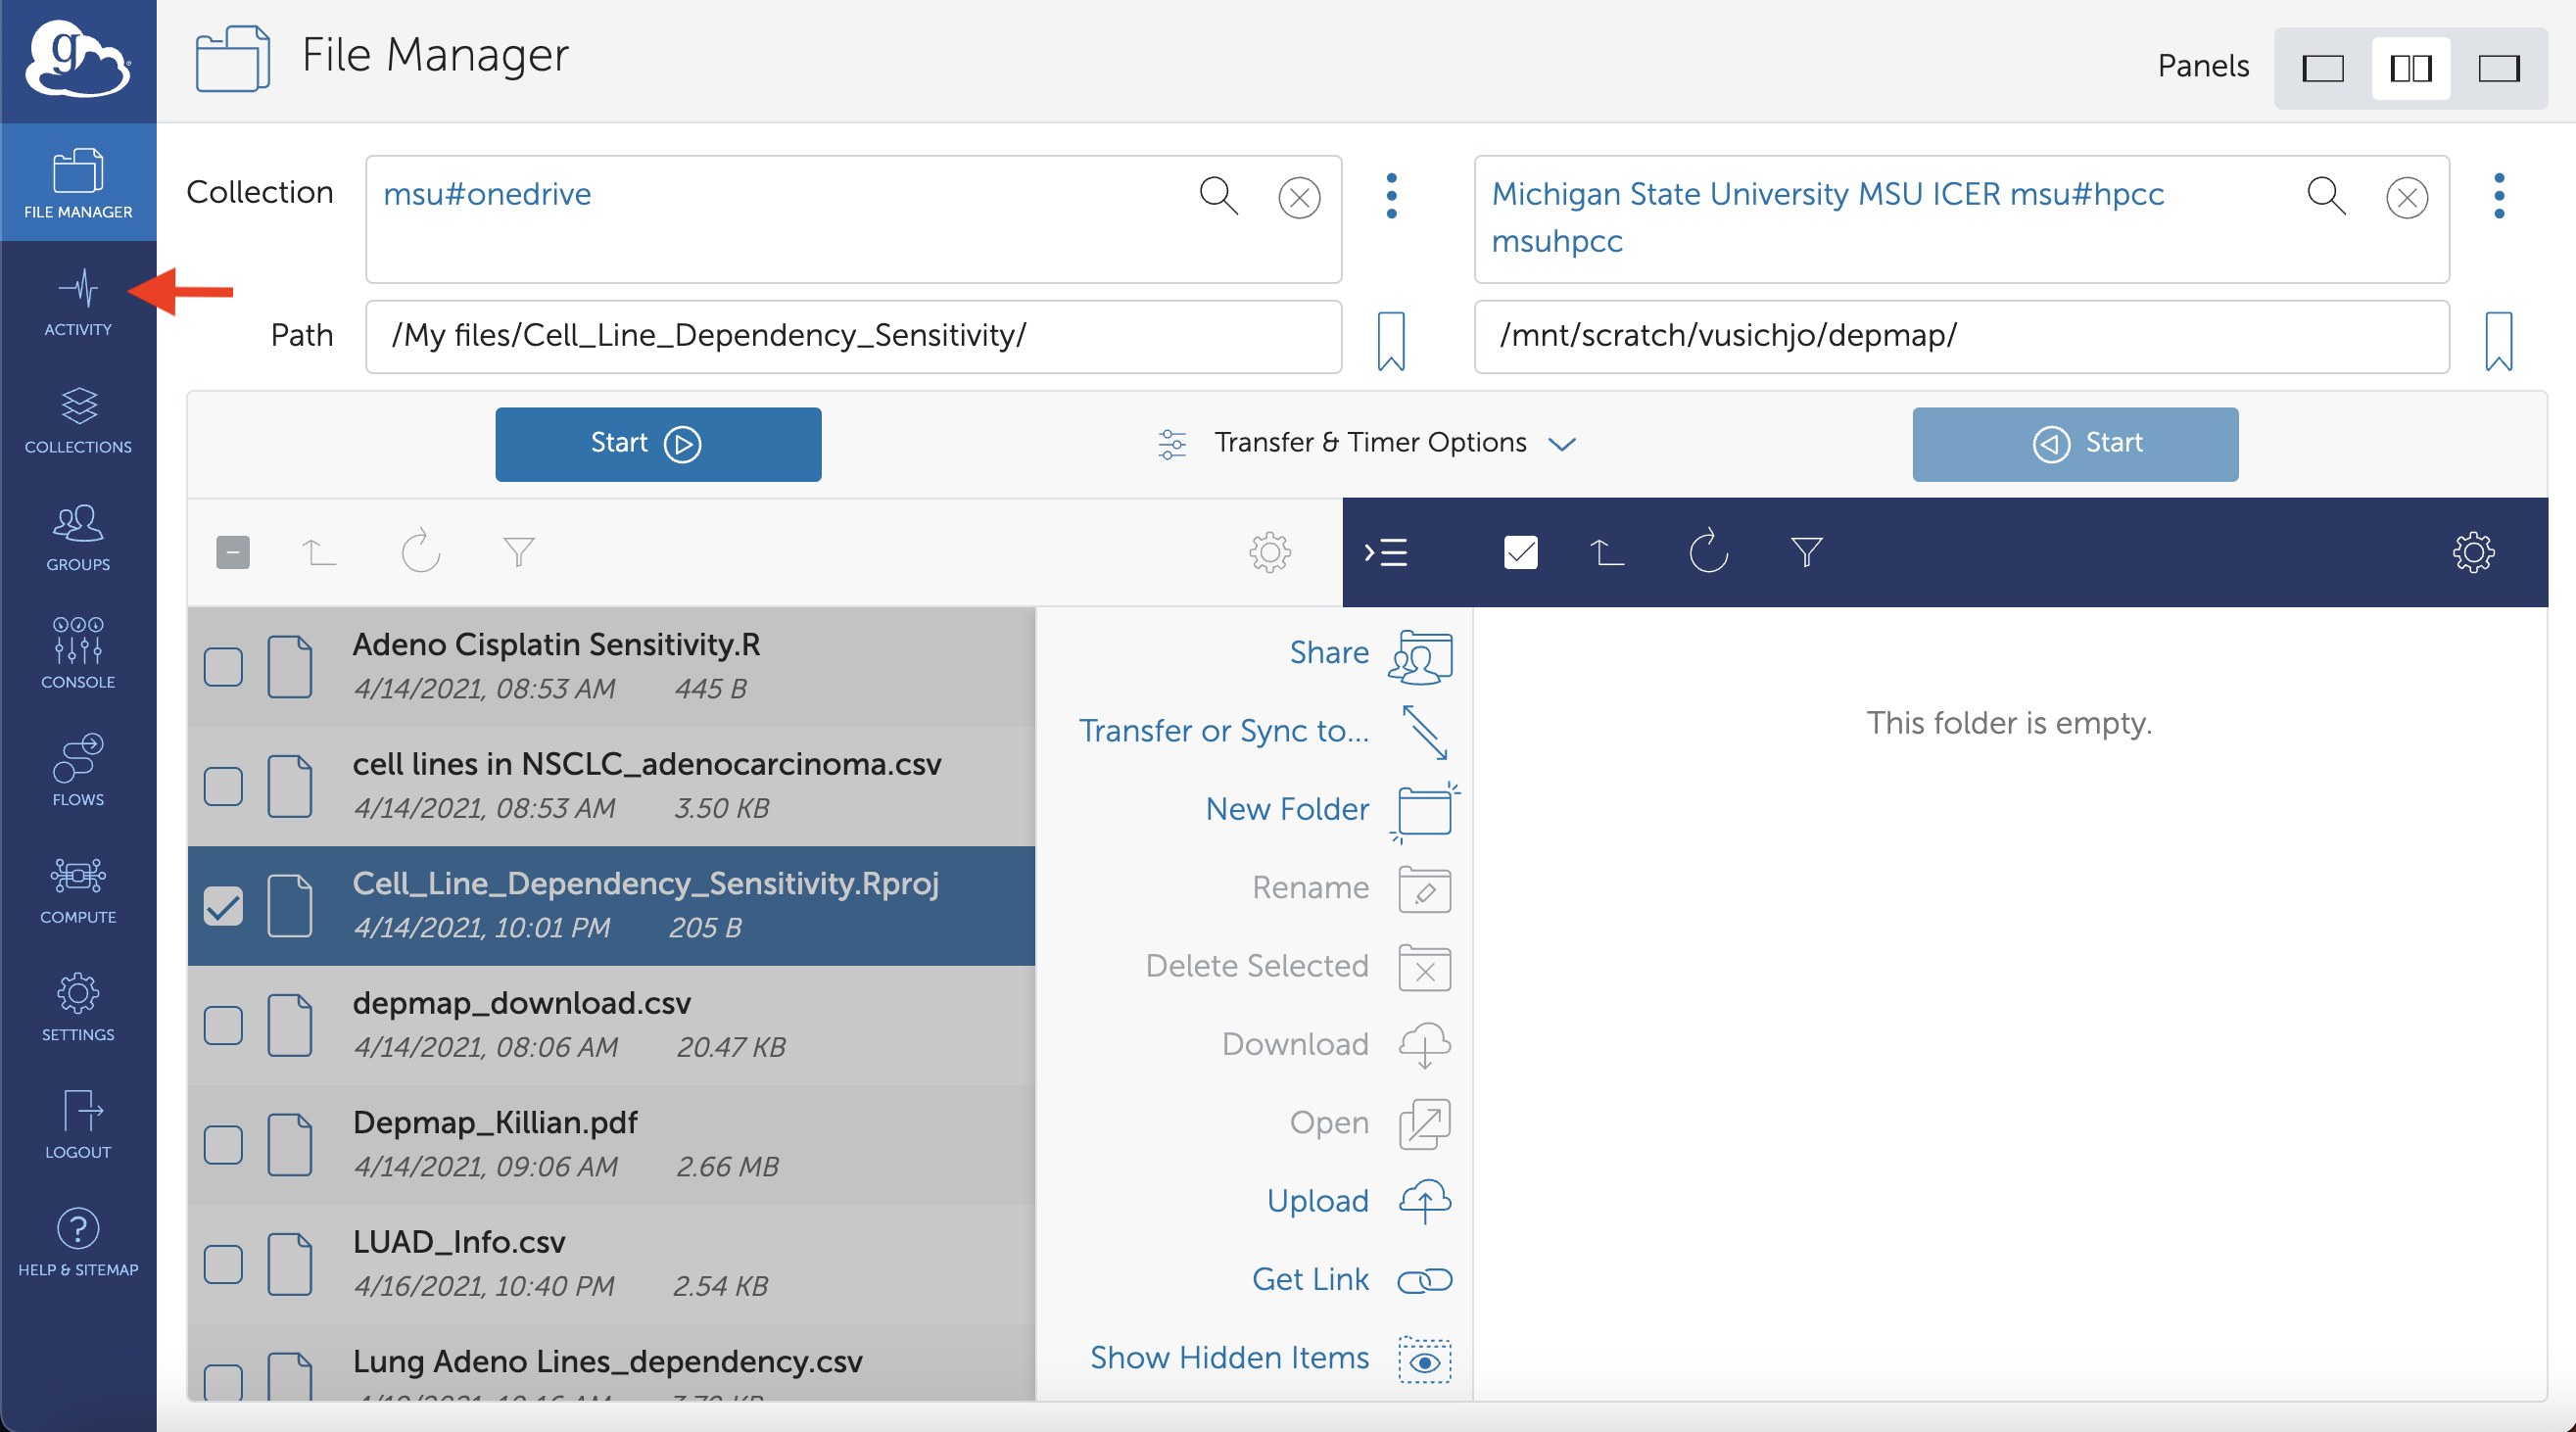
13. Monitor the Transfer Progress
- Click on “Activity” in the left-hand menu to view transfer progress.
- You can see active, completed, and failed transfers.
-
Globus may send you an email notification when the transfer is complete.
Tips for Successful Transfers
- Large Files: For larger files, ensure you have a stable internet connection to avoid transfer interruptions.
- File Permissions: After transferring, check file permissions on the HPCC if any access issues arise.
Troubleshooting
If you encounter issues:
- Ensure your endpoint (local machine) is active and connected.
- Check that you are logged into Globus and MSU HPCC endpoints.
- Review Globus support documentation.